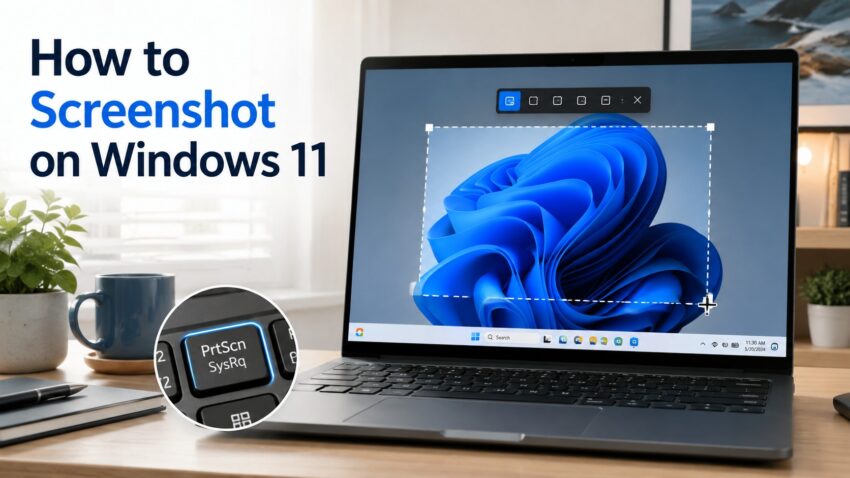
Need to capture something on your Windows 11 screen in the United States? Whether you are saving an Amazon order confirmation, an online banking receipt, a school portal message, a work-from-home support ticket, or proof of a software error, Windows 11 gives U.S. users several easy ways to take a screenshot.
This guide is written specifically for everyday Windows 11 users in the USA, including students, remote workers, small business owners, freelancers, gamers, and Dell, HP, Lenovo, Microsoft Surface, Acer, and ASUS laptop owners. Some U.S. keyboards label the screenshot key as PrtScn, PrtSc, Print Screen, or combine it with the Fn key, but the methods below work on most modern Windows 11 PCs sold in the United States.
Quick Answer: Best Windows 11 Screenshot Shortcuts for U.S. Users
- Windows + Shift + S: Open the Snipping Tool overlay and capture part of the screen.
- Print Screen: Copy the whole screen to the clipboard, or open Snipping Tool if that setting is enabled.
- Windows + Print Screen: Save a full-screen screenshot automatically.
- Alt + Print Screen: Copy only the active window.
- Windows + G: Use Xbox Game Bar for game and app screenshots.
Why U.S. Windows 11 Users Take Screenshots
In the United States, screenshots are often used for everyday digital records: saving purchase confirmations, documenting online banking or insurance messages, sharing school assignment screens, capturing work chat details, keeping travel booking proof, or sending error messages to an IT help desk. Before sharing any screenshot, check whether it includes private details such as account numbers, addresses, tax information, passwords, medical records, or payment details.
1. Use Windows + Shift + S for the Snipping Tool Overlay
The easiest screenshot method in Windows 11 is Windows + Shift + S. Press those three keys together and your screen will dim. A small toolbar appears at the top of the screen with capture options.
- Rectangular snip: Drag a box around the area you want.
- Freeform snip: Draw a custom shape.
- Window snip: Capture one open window.
- Full-screen snip: Capture everything on your display.
After you take the screenshot, it is copied to your clipboard. Click the notification that appears in the lower-right corner to open it in Snipping Tool, where you can crop, mark up, save, or share it. This is ideal for U.S. students, office workers, and support teams because you can capture only the important part of the screen and avoid exposing personal information.
2. Press Print Screen to Capture the Whole Screen
The traditional Windows shortcut is the Print Screen key. On many U.S. keyboards it appears near the top-right area, often beside Scroll Lock or Pause. On compact laptops, it may share a key with another function and require Fn + PrtScn.
By default, Print Screen copies your full screen to the clipboard. You can then paste it into Paint, Word, Gmail, Outlook, Google Docs, Slack, Microsoft Teams, or another app by pressing Ctrl + V.
If Print Screen opens Snipping Tool instead, that is a Windows 11 setting. Go to Settings > Accessibility > Keyboard and look for the option that uses the Print Screen key to open screen capture.
3. Use Windows + Print Screen to Save Automatically
If you want Windows 11 to save the screenshot as a file immediately, press Windows + Print Screen. Your screen may briefly flash, and Windows saves the image automatically.
You can find the file here:
Pictures > ScreenshotsThis is the best method when you need several screenshots in a row, such as documenting a U.S. online checkout confirmation, saving setup steps, keeping records for a workplace support ticket, or storing proof of an appointment, travel booking, or service request.
4. Use Alt + Print Screen for Only the Active Window
Press Alt + Print Screen to capture only the window you are currently using. This is cleaner than a full-screen screenshot because it avoids showing your desktop, browser tabs, taskbar, or other private information, which is especially useful when sharing screenshots with U.S. employers, schools, banks, insurance companies, or customer support teams.
After pressing the shortcut, paste the screenshot with Ctrl + V into an email, chat, document, or image editor.
5. Open the Snipping Tool App for Delayed Screenshots
For screenshots that require menus, hover states, drop-downs, or pop-ups, open the Snipping Tool app from the Start menu. Click Delay and choose a timer, such as 3, 5, or 10 seconds. Then set up the screen exactly the way you want before the capture begins.
This method is especially useful for tutorial screenshots, software documentation, online classes, remote-work instructions, and tech support requests in the United States.
6. Use Xbox Game Bar for Games and Certain Apps
Windows 11 includes Xbox Game Bar, which can capture screenshots from many games and apps. Press Windows + G, then use the Capture widget to take a screenshot. You can also try Windows + Alt + Print Screen for a quick Game Bar screenshot.
Game Bar screenshots are usually saved under:
Videos > CapturesThis is a good option for U.S. PC gamers, streamers, students recording software demos, and anyone capturing full-screen apps.
7. Use OneDrive Screenshot Backup
If you use OneDrive on your Windows 11 PC, you may be able to save screenshots automatically to OneDrive. This is helpful for U.S. users who switch between a home desktop, work laptop, school laptop, or Microsoft 365 account and want screenshots backed up to the cloud.
Check your OneDrive settings from the cloud icon in the taskbar. Depending on your version, screenshot options may appear under sync and backup settings. Once enabled, screenshots can be saved to your OneDrive pictures folder.
Where Are Screenshots Saved in Windows 11?
It depends on the method you use:
- Windows + Print Screen: Pictures > Screenshots on most U.S. Windows 11 PCs
- Snipping Tool: Clipboard first, then save wherever you choose
- Print Screen: Clipboard only, unless you paste and save it
- Xbox Game Bar: Videos > Captures
- OneDrive: OneDrive > Pictures or a similar synced folder
Troubleshooting: Print Screen Not Working?
If the Print Screen key does not work on your Windows 11 computer, try these fixes:
- Press Fn + Print Screen on laptops with shared function keys.
- Try Windows + Shift + S instead.
- Check Settings > Accessibility > Keyboard for Print Screen behavior.
- Restart Windows Explorer or reboot your PC if shortcuts stop responding.
- Make sure another screenshot app, keyboard utility, school testing browser, or workplace security tool is not overriding the shortcut.
Which Screenshot Method Should You Use?
For most people in the United States, Windows + Shift + S is the best all-around screenshot method in Windows 11. It is fast, flexible, and lets you choose exactly what to capture. Use Windows + Print Screen when you want files saved automatically, and use Alt + Print Screen when you only need one active window.
Once you know these seven methods, taking screenshots on Windows 11 becomes quick and reliable whether you are working from home in the USA, studying online, shopping from U.S. retailers, gaming, managing small business records, or helping someone troubleshoot a PC.